Advantages of Procedural Textures
Each procedural texture is a self-contained MDL application that computes and applies the material definition to the selected solid or surface. As well as the standard user defined parameters that appear in the Material Editor dialog, and the Mapping parameters in the Map Editor, further parameters are available when you open the Map Editor dialog for the map. These additional parameters are specific to each procedural texture.
Procedural textures have major advantages over standard material definitions:
- They look more natural because there are no seams caused by texture wrapping.
- They have virtually infinite resolution.
- They have editable settings allowing greater control over the material definition.
- A single procedural texture can be used to create a range of similar materials.
3D Procedural Textures
When applied to a solid or surface, a 3D procedural texture produces a different pattern for each axis. The effect is that the solid or surface appears to have been carved out of a single block of the material.
When a 3D procedural texture is used, there is no need to specify different materials for the top and sides of a model, as may be required with standard pattern maps. Variations of the material can be created by changing the Size X, Y, and Z values for the material in the Map Editor dialog. This lets you change the appearance of the material along any of the axes.
Consider the previous sample model with the sample 3D procedural texture "wood" applied. In this case, with a procedural texture, the sphere looks as though it was cut from a single material. On the slab, different patterns are applied to each face. Furthermore, the grains on each face of the slab and the grains on the cylinder render correctly. They run in the correct direction relative to each other and meet correctly at the edges. These differences in the top and sides were generated from the one 3D procedural texture.

2D Procedural Textures
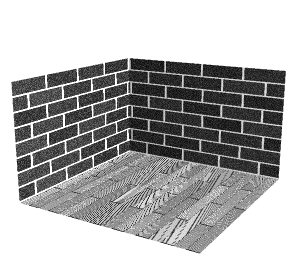
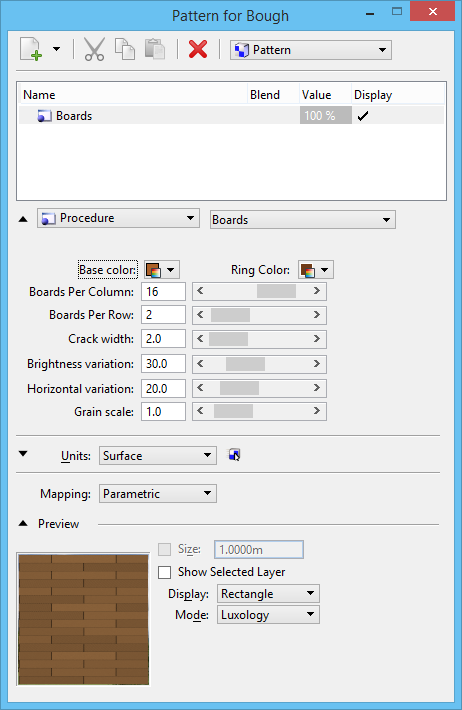
Like their 3D counterparts, you can change the appearance of 2D procedural textures using the Size X, and Y values in the Map Editor dialog. Each 2D procedural texture has its own specific settings as well, to control various aspects of its appearance. For example, you can change the thickness of the mortar in the brick texture, as well as the color of the bricks or mortar.
While 2D procedural textures work similarly to normal pattern maps, they are calculated for each surface. This may result in them not matching at edges, but on the other hand, there is none of the tiling that can occur with a normal pattern map (when a pattern is repeated).